OpenDX Features
Similar to the App Store, and Play Store Karaf and DDF have the concept of feature repositories and features. This allows for installation of new and updated applications and functionality from a curated in app marketplace. Using Karaf features, OpenDX makes is super simple to add new and updated features. This article will take you through the steps required to add a feature repo and select features for install. Before starting you may want to read the Karaf Features page for some background.
Add Codice Releases Repository
The first step is to point your DDF install at the Codice Nexus Maven repo. To do this locate and edit $DDF_HOME/etc/org.ops4j.pax.url.mvn.cfg.
An Example org.ops4j.pax.url.mvn.cfg is shown below.
################################################################################
#
#    Licensed to the Apache Software Foundation (ASF) under one or more
#    contributor license agreements.  See the NOTICE file distributed with
#    this work for additional information regarding copyright ownership.
#    The ASF licenses this file to You under the Apache License, Version 2.0
#    (the "License"); you may not use this file except in compliance with
#    the License.  You may obtain a copy of the License at
#
#       http://www.apache.org/licenses/LICENSE-2.0
#
#    Unless required by applicable law or agreed to in writing, software
#    distributed under the License is distributed on an "AS IS" BASIS,
#    WITHOUT WARRANTIES OR CONDITIONS OF ANY KIND, either express or implied.
#    See the License for the specific language governing permissions and
#    limitations under the License.
#
################################################################################
# DDF Changes: Disabled internet repositories
#
# If set to true, the following property will not allow any certificate to be used
# when accessing maven repositories through SSL
#
#org.ops4j.pax.url.mvn.certificateCheck=
#
# Path to the local maven settings file.
# The repositories defined in this file will be automatically added to the list
# of default repositories if the 'org.ops4j.pax.url.mvn.repositories' property
# below is not set.
# The following locations are checked for the existence of the settings.xml file
#   * 1. looks for the specified url
#   * 2. if not found looks for ${user.home}/.m2/settings.xml
#   * 3. if not found looks for ${maven.home}/conf/settings.xml
#   * 4. if not found looks for ${M2_HOME}/conf/settings.xml
#
#org.ops4j.pax.url.mvn.settings=file:${karaf.home}/etc/templates/settings.xml
#
# Path to the local maven repository which is used to avoid downloading
# artifacts when they already exist locally.
# The value of this property will be extracted from the settings.xml file
# above, or defaulted to:
#     System.getProperty( "user.home" ) + "/.m2/repository"
#
#org.ops4j.pax.url.mvn.localRepository=
#
# Default this to false. It's just weird to use undocumented repos
#
org.ops4j.pax.url.mvn.useFallbackRepositories=false
#
# Uncomment if you are behind a web proxy. PAX URL will use the proxy settings
# from the Maven conf/settings.xml file
#
# org.ops4j.pax.url.mvn.proxySupport=true
#
# Disable aether support by default.  This ensure that the defaultRepositories
# below will be used
#
org.ops4j.pax.url.mvn.disableAether=true
#
# Comma separated list of repositories scanned when resolving an artifact.
# Those repositories will be checked before iterating through the
#    below list of repositories and even before the local repository
# A repository url can be appended with zero or more of the following flags:
#    @snapshots  : the repository contains snaphots
#    @noreleases : the repository does not contain any released artifacts
#
# The following property value will add the system folder as a repo.
#
org.ops4j.pax.url.mvn.defaultRepositories=file:${karaf.home}/${karaf.default.repository}@snapshots
#
# Comma separated list of repositories scanned when resolving an artifact.
# The default list includes the following repositories:
#    http://repo1.maven.org/maven2
#    http://repository.ops4j.org/maven2
# To add repositories to the default ones, prepend '+' to the list of repositories
# to add.
# A repository url can be appended with zero or more of the following flags:
#    @snapshots  : the repository contains snaphots
#    @noreleases : the repository does not contain any released artifacts
#
org.ops4j.pax.url.mvn.repositories=https://tools.codice.org/artifacts/content/repositories/releases
Note line 81, the property is being set to use the Codice Nexus Release repository. This is where the opendx-feature repo is located.
org.ops4j.pax.url.mvn.repositories=https://tools.codice.org/artifacts/content/repositories/releases
Add OpenDX Features repo to DDF
Current OpenDX Feature Repo Version
The current release version for the OpenDX Feature Repository is 1.4. Please use the following for the Feature Repo URL:
mvn:org.codice/opendx-features/1.4/xml/features
The second step is to add the OpenDX Features repo to DDF, this can be accomplished through the Karaf console or from the web-based system console.
Karaf Console
Adding feature repos from the Karaf console simply enter
ddf@local>features:addurl mvn:org.codice/opendx-features/1.0/xml/features
ddf@local>
this shows the command features:addurl which takes a space separated list of feature repo urls.
System Web Console
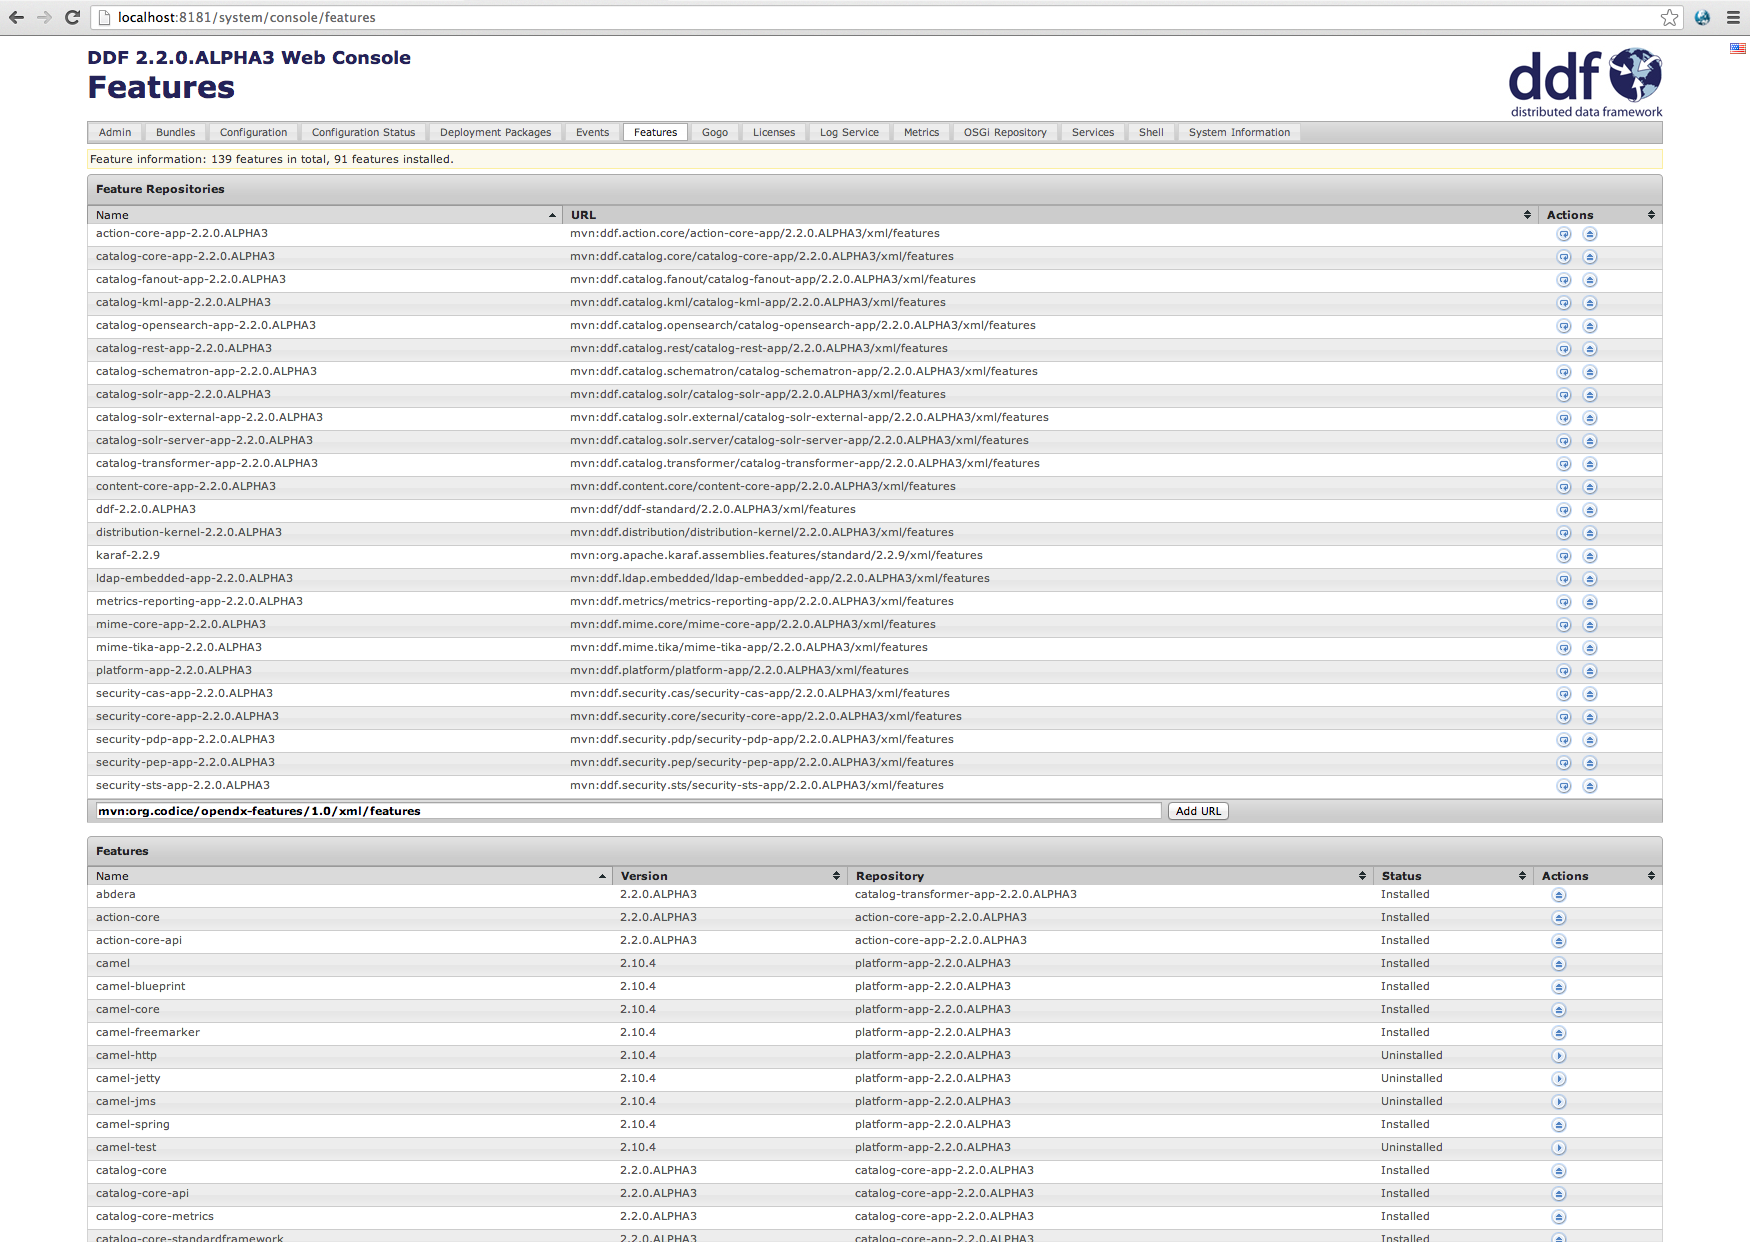
The second method for adding feature repos is through the system console. The image below shows how this is done. Enter the repo url in the Add URL field and click Add URL.
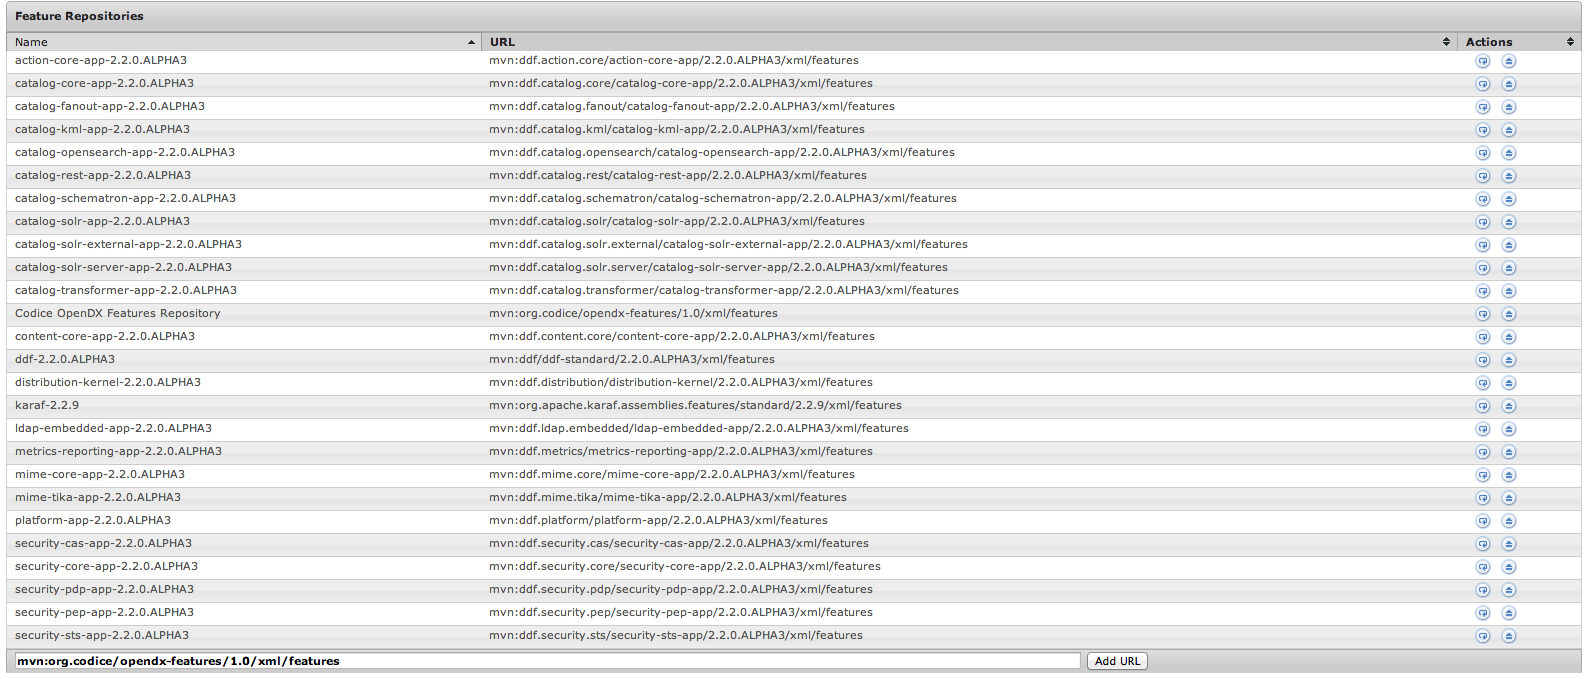
After you click the Add URL button the table will refresh and you will see the Codice OpenDX Features Repository.
That's it, you are now ready to install an OpenDX Feature.
Install an OpenDX Feature
In this example we will be installing the ais-input-transformer that is hosted in the OpenDX Feature repo. Again this can be done by using the Karaf console or the System Web Console.
Karaf Console
Using the Karaf console, you can install features using the appropriately named features:install command. An example of installing the ais-input-transformer is show below.
ddf@local>features:install ais-input-transformer
ddf@local>
The aid-input-transformer is now installed, you can verify this with the list command.
System Web Console
Installing features from the Web Console is a one-click proposition.
Clicking the install play button on the ais-input-transformer line will install the feature.
After clicking the button the feature has a status of installed. You are now all set to ingest some AIS data.


